How to Convert Normal Videos into 4K Quality in CapCut Using Hidden HD Filters
Want to make your normal videos look like they were shot in stunning 4K quality without using expensive cameras or editing software? In this guide, I’ll show you some of the best hidden CapCut filters that can dramatically improve your video’s sharpness, colors, and overall quality with just a few taps.
By the end of this tutorial, you’ll know exactly which filters to search for and how to combine them to give your videos a professional cinematic look.
What You’ll Need Before You Start
Before applying these filters, make sure you have:
- A working version of CapCut
- A reliable VPN (if CapCut features are restricted in your country)
You can easily download a free VPN from the Google Play Store or Apple App Store. Connect to any available server before launching CapCut to access all filter options.
Helpful Resources:
- CapCut Official Website: https://www.capcut.com/
- Google Play Store: https://play.google.com/store
- Apple App Store: https://www.apple.com/app-store/
Step 1: Import Your Video
- Open CapCut.
- Tap New Project.
- Select the video you want to enhance.
- Add it to the timeline.
At this stage, your video may look completely normal. Now it’s time to improve its quality.
Step 2: Open the Filters Section
Tap on the Filters option.
CapCut already includes hundreds of filters that improve:
- Video quality
- Color grading
- Sharpness
- Brightness
- Contrast
Instead of scrolling through all of them, simply use the Search option.
Filter #1: Search “HD”
The first keyword you should search is:
HD
You can also try:
- HDR
Searching these keywords will reveal several hidden quality enhancement filters.
Some of the best ones include:
HD Cam 2
This filter noticeably enhances video quality while giving your footage a darker cinematic appearance.
HD Upscale
One of the best filters for:
- Increasing sharpness
- Improving details
- Making colors richer
HD Dark
Perfect if you want a dramatic look with darker tones while still enhancing video quality.
HD Sunlight
Adds a warm yellow tone that works well for outdoor videos.
HDR
HDR provides better dynamic range, richer colors, and improved clarity without making the video look unnatural.
Among all the HD filters, the creator’s favorites are:
- HD Cam
- HDR
- HD Dark
Feel free to experiment and choose the one that best suits your footage.
Filter #2: Search “Quality”
The second keyword is:
Quality
CapCut offers several Quality filters, but two stand out.
Quality 2
This is one of the strongest filters because it increases overall clarity while preserving the video’s original colors.
Quality 1
This filter also enhances details and sharpness while keeping the image natural.
If you compare the before-and-after results, you’ll immediately notice how much cleaner and sharper your footage becomes.
Filter #3: Search “Restore”
Now search for:
Restore
You’ll find quality restoration filters that improve older or slightly blurry videos.
These filters work especially well when your original footage lacks sharpness or has compression artifacts.
Filter #4: Search “Enhance”
Another excellent keyword is:
Enhance
CapCut provides multiple Enhance filters that automatically improve:
- Sharpness
- Lighting
- Overall video clarity
Try a few versions and keep the one that gives the best result for your footage.
Filter #5: Search “Focus”
This is one of the creator’s absolute favorite filters.
Simply search:
Focus
The Focus filter does three things simultaneously:
- Enhances video quality
- Adds beautiful background blur
- Improves color grading
It instantly gives your footage a much more cinematic appearance.
If you only use two filters in CapCut, Focus should definitely be one of them.
Filter #6: Search “Bokeh”
Another excellent option is:
Bokeh
This filter creates a soft cinematic background blur while improving:
- Colors
- Sharpness
- Overall visual quality
It’s perfect for portrait videos and Instagram Reels.
Filter #7: Search “Back Light”
One of the hidden gems inside CapCut is:
Back Light
This filter enhances lighting, making videos appear brighter and more professionally shot.
It works especially well for indoor recordings.
Filter #8: Search “8K”
You can also try searching:
8K
Depending on your version of CapCut, you’ll discover several additional quality-enhancing filters.
Some users may find more than eight different enhancement filters, so it’s worth experimenting.
Best Filter Combination
Instead of applying too many filters, using just two carefully selected filters often produces the best results.
A great combination is:
- Focus
- HD Cam 2 or HDR
This combination delivers:
- Better sharpness
- Improved colors
- Professional cinematic blur
- Higher perceived resolution
Sometimes, less is more.
Fine-Tune Your Video with Adjustments
After applying your filters, go to the Adjust section and make a few small tweaks.
Recommended settings:
- Increase Sharpen
- Slightly increase Brightness
- Add a little Saturation
- Reduce Temperature slightly for cooler blue tones
- Add a small amount of Shadows
These adjustments help your video appear even more polished without looking over-edited.
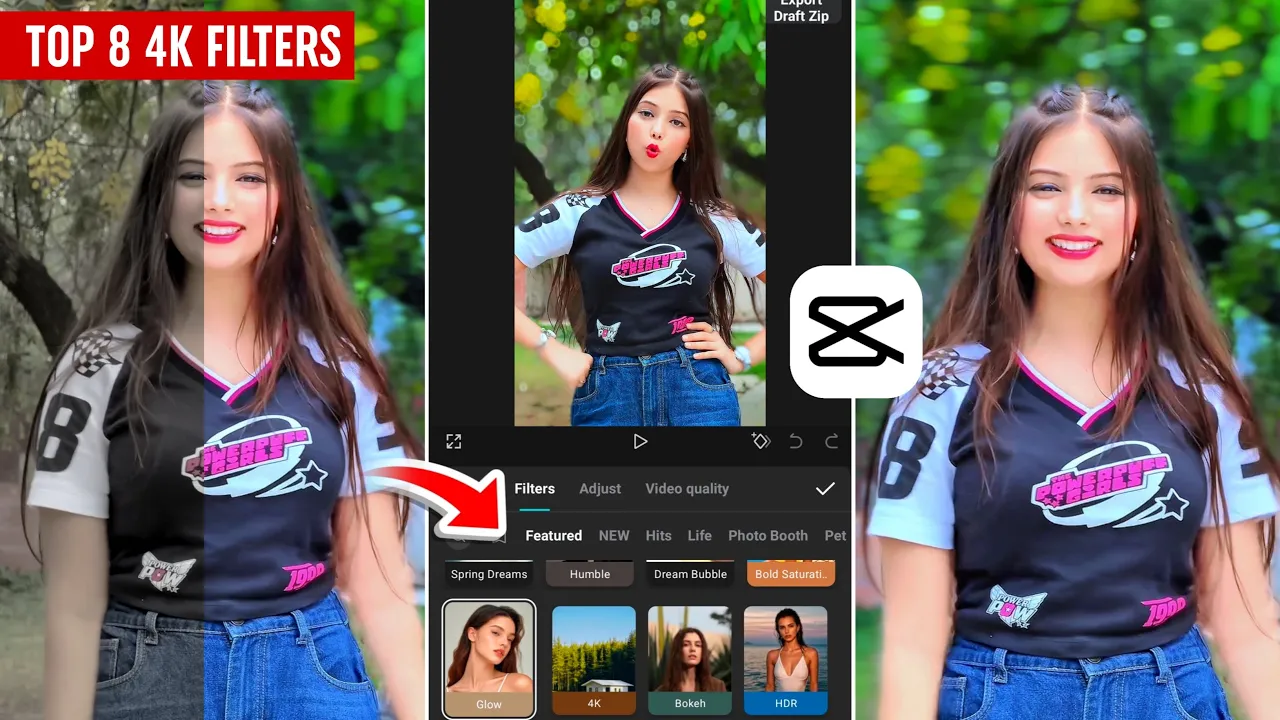
Before vs After
The difference is immediately noticeable.
Before:
- Normal colors
- Soft details
- Average video quality
After:
- Sharper image
- Better lighting
- Richer colors
- Cinematic background blur
- Professional-looking footage that resembles 4K quality
Even videos recorded on average smartphones can look significantly better using these filters.
Quick Recap
Here are the main search terms you should remember inside CapCut:
- HD
- HDR
- Quality
- Restore
- Focus
- Bokeh
- Enhance
- Back Light
- 8K
You don’t need to use every filter. Try different combinations and keep the two that produce the best results for your specific video.
Final Thoughts
That’s all for today’s tutorial!
With these hidden CapCut filters, you can dramatically enhance your videos and give them a crisp, high-quality appearance that looks much closer to 4K. Remember, the best results come from combining the right filters with subtle manual adjustments rather than stacking too many effects.
Experiment with the filters, compare the before-and-after results, and find the style that works best for your content.
If you found this guide helpful, keep exploring new CapCut features and editing techniques to make your videos stand out on Instagram, YouTube Shorts, and TikTok.
Useful External Resources
- CapCut Official: https://www.capcut.com/
- CapCut Learning Center: https://www.capcut.com/resource
- Google Play Store: https://play.google.com/store
- Apple App Store: https://www.apple.com/app-store/
- YouTube Creator Academy: https://creatoracademy.youtube.com/
Happy editing, and see you in the next tutorial!