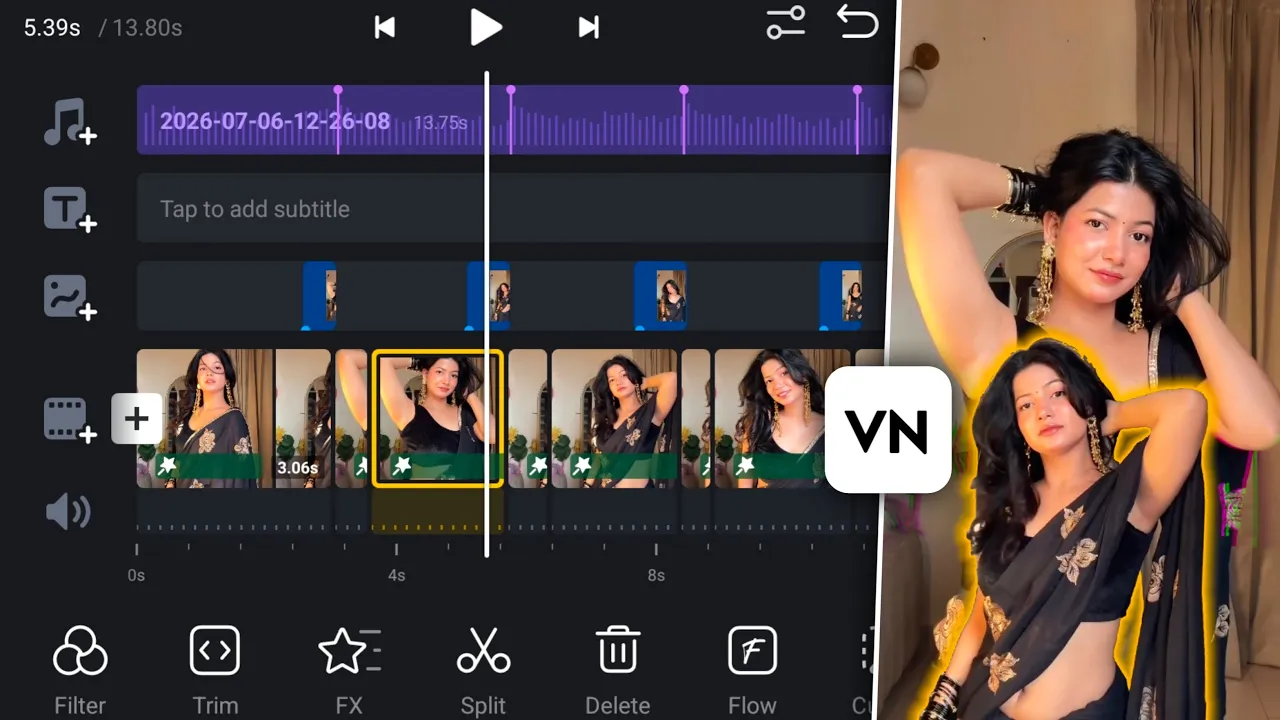
If you’ve been scrolling through Instagram Reels, TikTok, or YouTube Shorts lately, you’ve probably noticed those eye-catching cut-out transition videos where photos smoothly pop onto the screen with stylish animations and beat-synced effects.
In today’s guide, I’ll show you how to create a trending cut-out transition video using the VN Video Editor app by following a few simple steps. You don’t need any advanced editing skills—just follow along, and you’ll be able to create professional-looking edits in minutes.
Let’s get started!
What You’ll Need
Before starting, make sure you have:
- VN Video Editor installed on your phone.
- Several photos you want to use in your edit.
- A trending music track (or extract audio from an existing video).
Download VN Video Editor: https://play.google.com/store/apps/details?id=com.frontrow.vlog
Step 1: Install and Open VN Video Editor
First, download and install the VN Video Editor from the Google Play Store or Apple App Store.
Once installed:
- Open the application.
- Tap the + (Plus) button.
- Select New Project.
The editing workspace will now open.
Step 2: Import Your Photos
Now it’s time to add your images.
- Open the Photos section.
- Select all the pictures you want to include.
- Tap Add.
All of your selected photos will appear on the timeline.
You can also rearrange them by dragging each photo to the position you prefer.
For example, if you want a different image to appear first, simply move it to the beginning of the timeline.
Step 3: Add Your Music
Since this transition works according to the music beats, adding your soundtrack is the next important step.
Here’s how:
- Tap the Music option.
- Choose music from your device.
- Or select Extract From Video if you want to use audio from another video.
Once selected, the music will automatically appear on your timeline.
Step 4: Mark the Beats
Beat marking is what makes your transitions look perfectly synced.
To do this:
- Tap the Beats option.
- Play your music.
- Every time you hear a beat, tap to create a Beat Marker.
Continue until you’ve marked every major beat in the song.
This will make it much easier to match every image transition with the music.
Step 5: Match Every Photo with the Beat
Now adjust each photo so it ends exactly at a beat marker.
If a photo lasts too long:
- Trim it.
- Drag its ending to align perfectly with the beat.
Every image should start and end according to your beat markers for smooth editing.
Step 6: Duplicate the Second Photo
To create the cut-out transition:
- Select the second image.
- Tap Duplicate.
- Move the duplicated photo into the PIP (Picture in Picture) layer.
Trim the duplicated layer so it only covers the transition area.
Then resize it to fill the screen.
If needed, use the Fit option.
Step 7: Remove the Background
Now comes the exciting part.
Inside the PIP layer:
- Scroll until you find Cut Out.
- Tap it.
VN will automatically remove the background from your image.
Once completed, your subject will remain while the background disappears.
Step 8: Add a Stylish Outline
To make your cut-out stand out:
- Open Cut Out Stroke.
- Choose your favorite outline style.
- Select any color you like.
- Adjust the stroke thickness.
Experiment with different colors until you find one that matches your overall theme.
Step 9: Create the Transition Animation
Now it’s time to animate your subject.
Add:
- One Keyframe at the beginning.
- One Keyframe at the end.
Move or resize the first keyframe however you like.
For example:
- Make the subject smaller.
- Move it to the bottom.
- Place it on the left or right side.
The ending keyframe should remain in its normal position.
VN will automatically create the animation between both keyframes.
Step 10: Smooth the Motion Curve
To make your animation look professional:
Open the Curve settings.
The best options are:
- Quart Out
- Back Out
Both create a smooth, natural-looking movement that’s commonly used in trending edits.
Step 11: Add Effects (FX)
Now give your transition even more style.
Tap:
Image → FX
You’ll find dozens of visual effects.
Some popular options include:
- Digital
- Glitch
- RGB
- Zoom
- Blur
- Shake
Try different styles until you find the one you like.
If the effect feels too fast, simply reduce its speed.
Step 12: Repeat for Every Photo
Now repeat the exact same process for every remaining image:
- Duplicate
- Move to PIP
- Remove background
- Add stroke
- Create keyframes
- Apply curve
- Add effects
Once you’ve finished all your photos, your entire project will have matching cut-out transitions.
Step 13: Add Motion After Each Transition
Sometimes the image becomes too static after the animation finishes.
To make it more dynamic:
- Split the image after the transition ends.
- Open FX.
- Apply an effect such as:
- Glitch
- Fuzzy
- RGB
- Digital
This adds extra movement and keeps the video engaging.
Step 14: Animate the First Photo
Don’t forget the first image.
Since every other photo has effects, the first one should too.
Add:
- Zoom In
- Zoom Out
- Any subtle opening animation
This creates a consistent style from beginning to end.
Step 15: Preview Your Video
Play the entire project with your music.
Check:
- Beat synchronization
- Smooth transitions
- Animation speed
- Effects
- Overall flow
If anything feels slow, simply shorten the clip duration and adjust the keyframes again.
Step 16: Export in High Quality
Once you’re satisfied:
Tap the Export button.
For the best quality, use these settings:
- Mode: Manual
- Resolution: 1080p
- Frame Rate: 60 FPS
- Bitrate: Around 50 Mbps
Now export the video.
Within a few moments, your trending cut-out transition video will be saved to your device in high quality.
Pro Tips for Better Viral Edits
- Use high-resolution photos for cleaner cut-outs.
- Keep transitions synced perfectly with the music beats.
- Don’t overuse effects—subtle animations usually look more professional.
- Use trending audio to increase your chances of getting more views.
- Maintain consistent colors and stroke styles throughout the video.
Helpful Resources
If you’re new to VN Video Editor or want to improve your editing skills, these official resources are worth checking out:
- VN Video Editor Official Website: https://vlognow.me/
- Google Play Store (VN Editor): https://play.google.com/store/apps/details?id=com.frontrow.vlog
- YouTube Creator Academy: https://creatoracademy.youtube.com/
- Instagram Creators: https://creators.instagram.com/
Final Thoughts
That’s it! By following these simple steps, you can easily create a trending cut-out transition video in VN Video Editor without using complicated software.
With a little practice, you’ll be able to produce smooth, beat-synced edits that look perfect for Instagram Reels, TikTok, YouTube Shorts, and other social media platforms.
Try experimenting with different music, effects, and keyframe animations to develop your own editing style.
Happy editing, and keep creating awesome content!